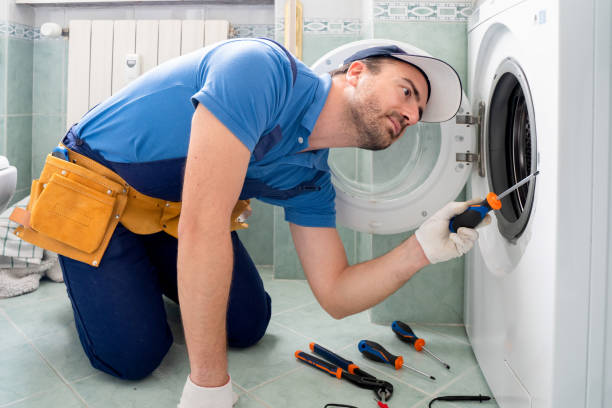
If the washing machine has been working at its limits for a long time and without proper preventive maintenance, technical malfunctions appear. They require the intervention of a specialist. The rest can be dealt with independently.
A foreign object in the tank
Take a flashlight, and examine the drum from the inside. It is important to have a good look at everything – whether a foreign object will be found there.
Block the pulley with a piece of wood, unscrew the fixing bolt, remove the pulley, and screw the bolt back on, but not all the way. Now hit the bolt with a hammer, trying to keep the threads.
As a result of the blows, the shaft and drum will move slightly forward, and the excess item will go down where it is easy to reach. Put the pulley back in place, screwing the bolt all the way in. Install the back of the machine, and fasten all the bolts.
The flaps in the vertical machine have opened
In vertical machines, it is not uncommon for the tank flaps to open during spinning. The cause is sometimes not related to a leaky latch.
Perhaps, an over-intelligent child got in and turned the drum with the flaps open. Or an adult loaded too much laundry and a piece of cloth got on the latch.
The problem does not look serious. But the severity of the consequences depends on when exactly the flaps opened. If on a delicate wash, in most cases, nothing terrible happens.
But during a strong spin, the open blades can turn into meat grinder blades and ruin everything that comes in the way.
The blades break through the safety barrier at speed. The heating element is the first to be hit, followed by damage to the walls of the tank itself and the drum flaps. When all three elements break, the repair is expensive. It is cheaper to buy a new washing machine.
Let’s try to solve the problem differently. It is necessary to try with minimum effort and gently return the drum to its original position.
If it did not work, try to close the flaps. You will need a strong, resilient steel wire with a diameter that goes through the holes in the drum.
Using pliers, bend the end of the wire about half a centimeter to form a hook. Carefully slip it into the hole. Using a flashlight in one hand and a wire in the other, we try to close the flaps.
If we succeed, it will be possible to rotate the drum. When the wire fails to catch the flaps or they cannot be kept rotating and still open, you will have to disassemble the washer.
Inspect the flaps, the integrity of the tank, and the damage to the heating element. Significant deformations are a reason to think about buying a new washer.
The corroded bearing jammed
Wear of the bearing – another malfunction, provoking a stop of the drum. We have it disassembled, let’s check the bearing. Carefully knock out the part with a handy tool.
In addition to the bearing itself, the oil seals should be replaced. Apply Athol to the place where the bearing is installed, and put the elements back. Secure with a hammer.
Assemble the drum very carefully. Treat the joint with sealant to avoid leaks. There are models of machines with non-separable tanks, it is wise to entrust their repair to a technician with North Country Appliance Repair Service.
The drive belt is loose or deteriorated
Remove the back panel of the machine, and look at the condition of the belt. If it just slipped off, put it back on, close the lid, turn on the washer, and check its operation. If it is completely worn, the damage will need to be replaced.
They are made of chloroprene rubber, polyester cord, and cotton material, due to which they are elastic and have high strength characteristics.
The V-belt is tensioned by moving the motor, so it is necessary to loosen the fasteners. When the adjustment stroke of the motor is small or such maneuver is excluded by the design of the machine, the belt must be replaced.
We install the V-belt as follows: wind it on the pulley, then place the strip in the pulley groove and put it there completely, rotating the pulley.
The clinic belt has a toothed section. The parameters are also marked on the outside. It is changed in the same way as the wedge belt. But it needs a careful check of the position after the final installation.
We measure the middle of the mating part of the engine pulley and the drum – the belt is installed strictly on this line. The V-belts are tauter than the V-belts.
We also recommend that you read the detailed instructions for selecting and replacing the belt in your washing machine.
If you still did not manage to recognize the cause of this breakdown by all the points provided above, or if you do not want to waste time guessing, North Country Appliance Repair Service is always happy to help you and provide a professional diagnosis and repair of your washer in a timely manner.
Contact us


